In this guide, I’ll show you my 12-step process that I’m testing out for AI content generation. I’ll also show you my initial results, all the tools and techniques I’m using, and a few interesting nuggets I’ve learned.
After reading this guide, you’ll understand how to make SEO-optimized AI content at that Google won’t slap you for. And you’ll have everything you need to try this process for yourself or make a similar process.
I won’t even be plugging an overpriced content-generation app. You’ll only need GPT for Sheets, an OpenAI API key, ChatGPT, and Moonlit. With these tools and strategies, it will only cost a few dollars to generate content.
Is AI content safe to use for SEO?
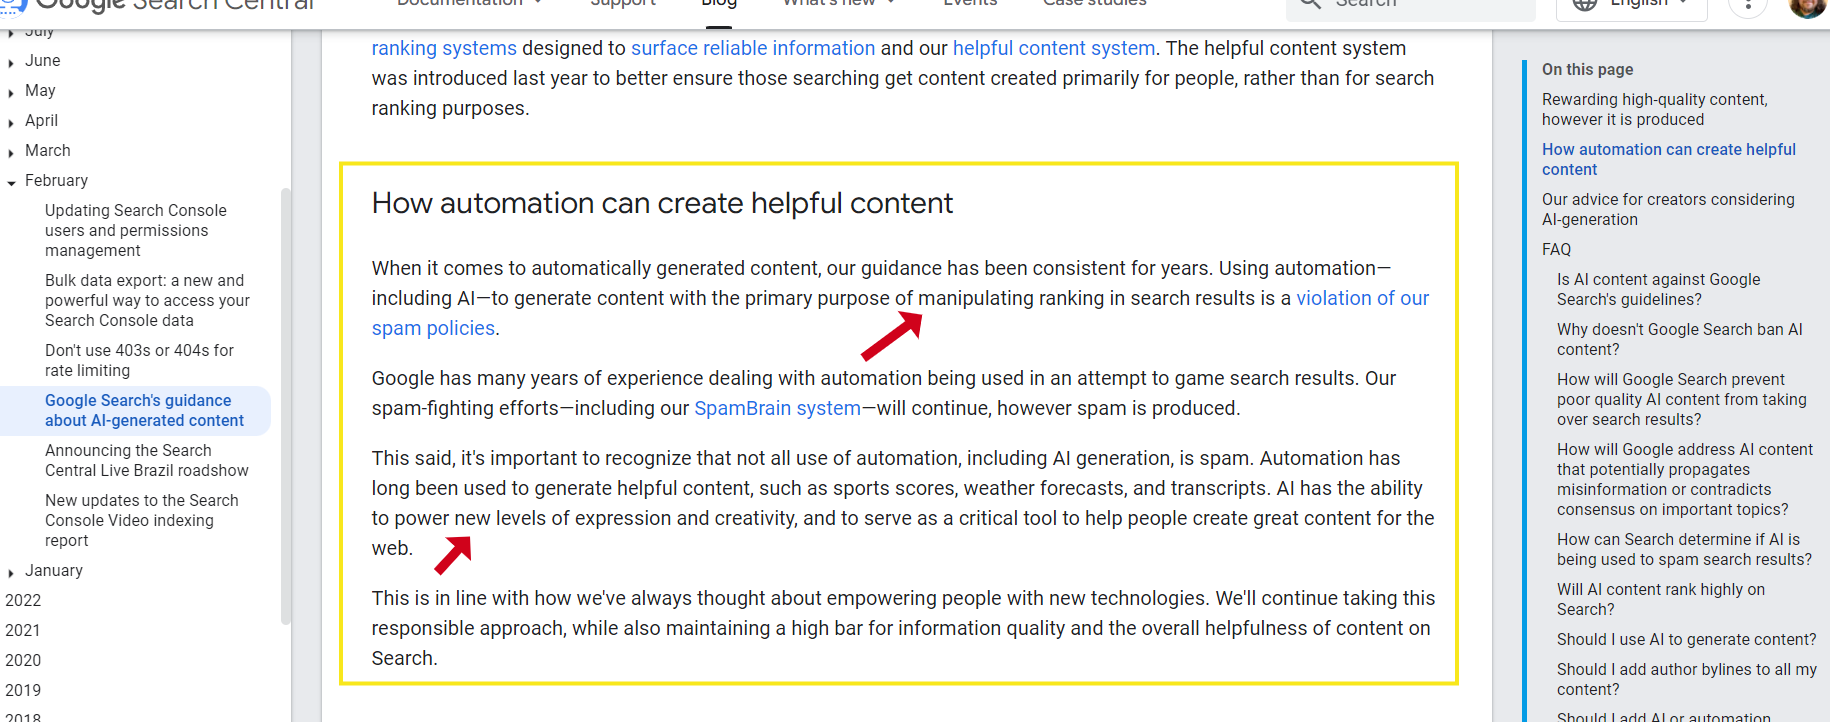
AI content is safe to use. Google even recently changed its stance on this. Their guidelines used to say AI content is spam and against Google’s web content guidelines. Now they have shifted their statements to focus on the quality of content rather than how it’s produced.
Another key consideration is that Open AI can’t tell if ChatGPT-generated content was generated by an AI or a human. Open AI even shuttered a tool they were developing to detect AI text usage due to low accuracy.
These two insights speak volumes for those who are still learning how safe AI content is. Google says it’s OK because it’s all about quality. And our best AI tools can’t accurately tell if text is AI-generated (yet).
Are you skeptical about AI content?
If you’re still skeptical about leveraging AI for content, read on. I was too at the beginning. But after using AI for over a year, I have a broadened perspective on how to best use AI for SEO content. For both generating and improving content.
You’ll find that plenty of creative human thinking and editing is still needed to create content that people will enjoy. AI just helps speed up some of the steps in the process.
The #1 rule for creating valuable SEO content
When it comes to AI-generated content, especially for SEO, there is one cardinal rule that will ensure long-term success. And that’s to make helpful content for people.
Instead of keyword content for search engines.
That may sound like an oversimplification, but it’s true. And it’s not an AI-only rule.
Keyword-focused content is abundant and increasingly ineffective
With the rise of AI content generation tools, pages about every topic become abundant. And anything about general information becomes less valuable. If ChatGPT can easily answer a question, the only reason you would make a page to answer that same question is if your brand’s perspective adds value. More on this later.
Essentially, it doesn’t make sense to keep focusing on the main keywords showing in Ahrefs. This was already an overdone strategy, and AI made it 10x more overdone.
My process: Search engine validation + people-focused improvements
In the next steps, I’ll outline how my process is based on a search engine validation + people-first approach. I’ll share some insights for a test site using both random unhelpful AI content, and thoughtfully curated and edited people-first AI content. Plus I’ll show you how Google reacted to both types of content.
Initial results from this process
I tested an earlier version of this process on my AI content test site a few months ago.
I previously published 500 pages of random AI generated articles with really odd topic combinations.
I didn’t plan an SEO strategy around this, I was more interested in the content generation process itself.
However, I did go back and edit one subcluster of my AI generated content manually.
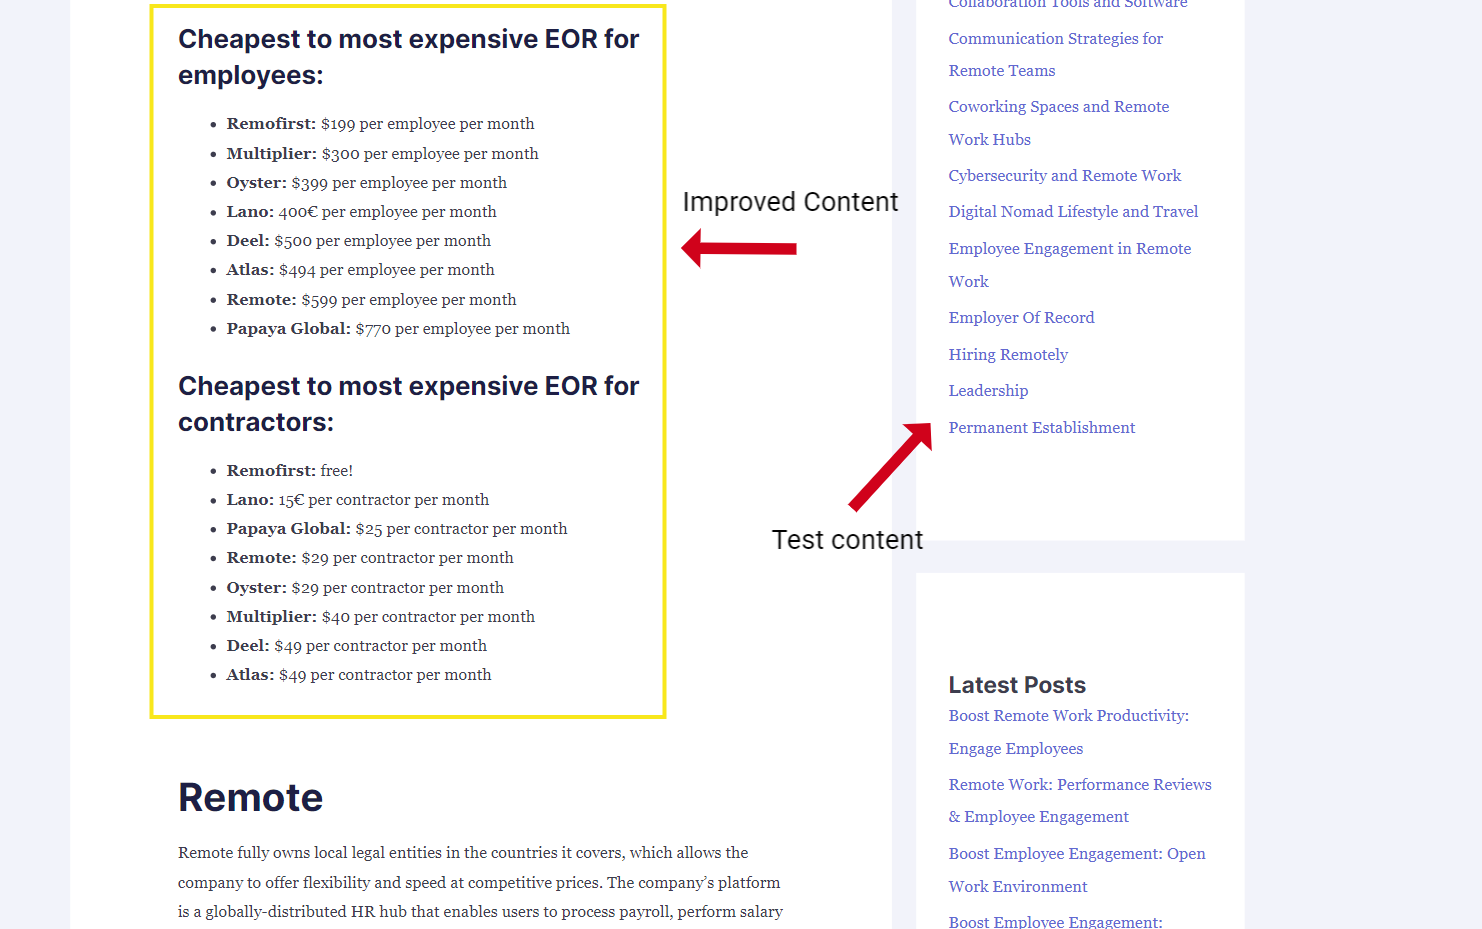
I added internal links, images, statistics, and my own personal touch.
I turned this single subcluster from generic pages, to decent pages that someone might actually benefit from reading.
So I had one cluster of somewhat-decent AI content, and an ocean of random test content.
Results from the AI content test

The results are really interesting. The only content that is really doing anything is a few pages within the subcluster that I improved upon. Impressions are rising and clicks are following.
The random AI pages get a few clicks and impressions, but I don’t think they will ever pass Google’s quality thresholds. I could have got better performance if I had used a better SEO strategy like the one I’ll outline below.
Another important takeaway was that the pages that ended up performing well were not the ones I was expecting to perform well. Bias can be misleading!
My learnings informed my tools, apps, and processes
I learned a lot from this experiment. Below is my improved process that I’m going to use to get even better results on a new test site about coffee. This time I’ll be using my learnings, an improved SEO process, and several tools that I’ve built to aid along the way.
1. Creating My Topical Map
Creating a topical map is pretty easy. It’s a high-level strategic planning task that only takes a few minutes. You can use it for a brand new project, or apply it on a site already covering a certain set of topics. I even built an AI tool and guide that helps you plan your topical map.
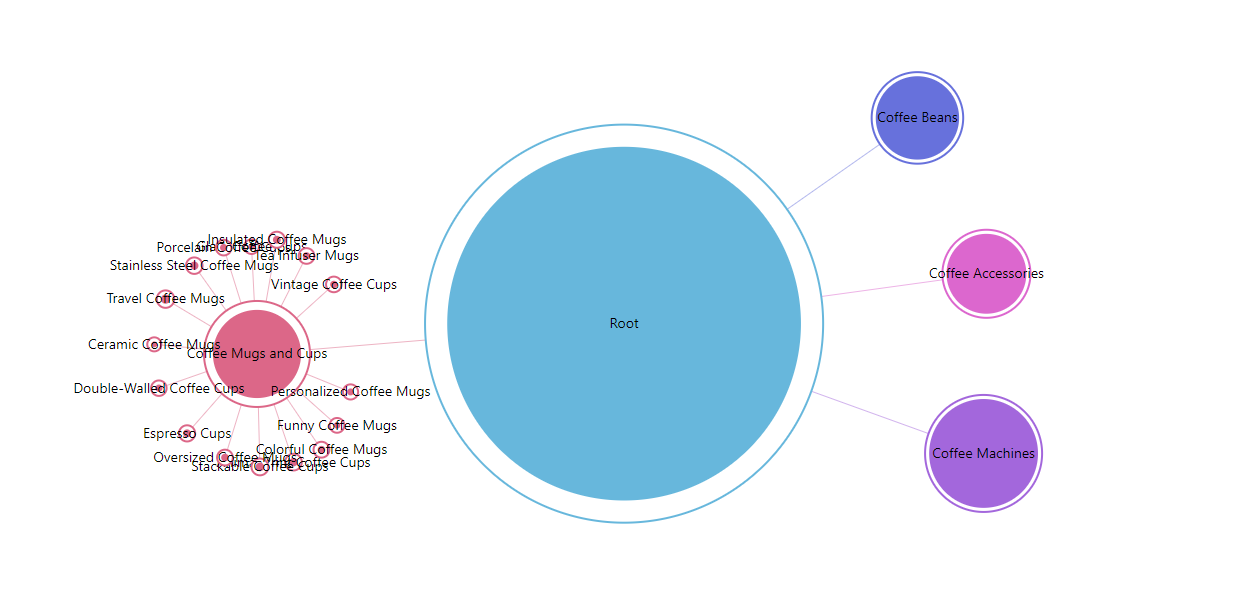
Creating a topical map is just an easy way to plan what kind of content a website will have and why. So step one is to plan a topical map. Use the link above to open my Topical map guide and use my Topical Map Generator app.
Benefits of creating a topical map
I’m not a semantic SEO expert. But topical maps are something anyone investing in SEO can benefit from.
Using a topical map also helps you avoid creating irrelevant content. It’s pretty easy for those newer to SEO to miss the mark and create high-level fluff content that doesn’t help anyone or add any value to the web.
If you want to learn more about topical maps in general, I recommend checking out ‘s full guide and case study. He’s the originator of topical maps and topical authority.
2. Expanding the topical map
Once I have an initial topical map, I just need to expand on it. My guide covers how to do that, and even provides ChatGPT prompts for topical map expansion.
So step two is to expand your topical map using the guide above.
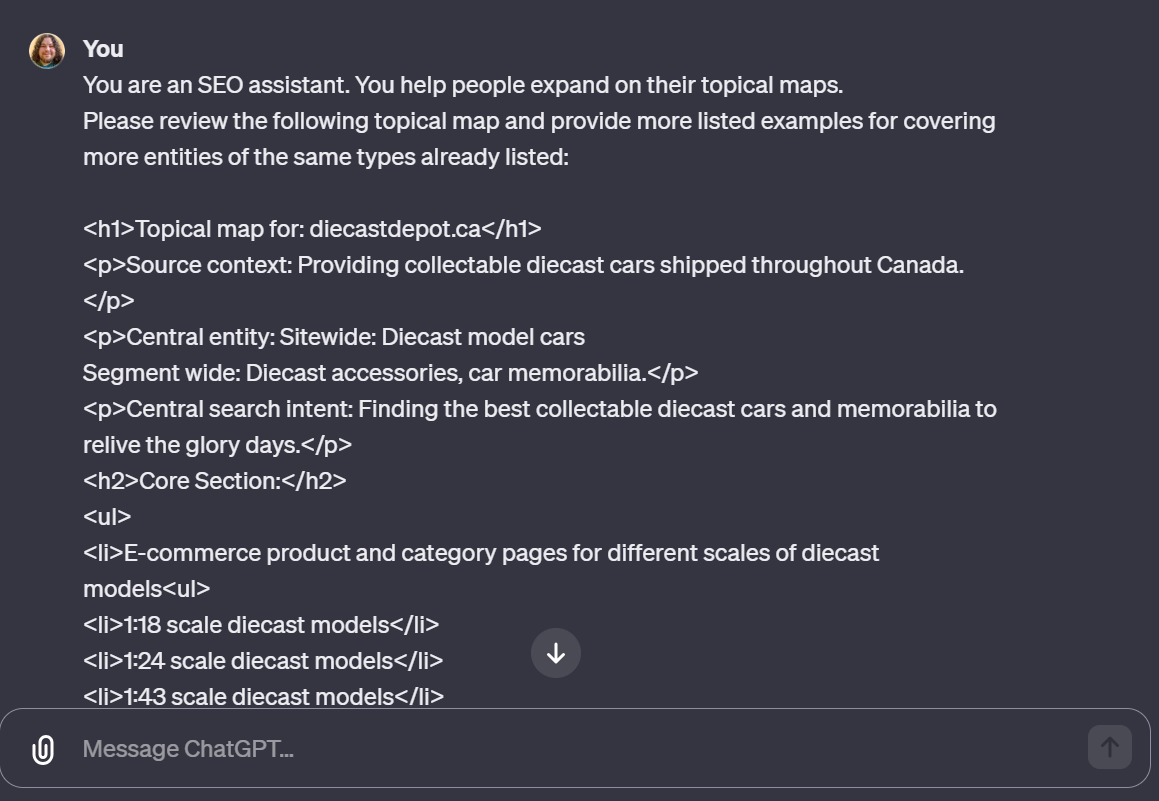
Topical map expansion example
Expanding a topical map is easy and is mostly a creative thought exercise.
For example, if part of my topical map consists of reviewing coffee products, and in my list I have coffee maker reviews and coffee bean reviews, I could then expand with new types of reviews. I could review coffee grinders, coffee accessories, coffee shops, coffee brands, and more.
As long as creating this type of content is relevant for my brand and audience, its fair game.

At this point I have a Google sheet with two tabs. One for my initial topical map, and then my expanded topical map.
How big does the topical map need to be?
You don’t need a massive topical map. You can always go back and expand your map further with new types of content. There will be plenty of content to produce within a single cluster. A topical map with 50 subclusters can easily equate to 500 pages. Read on to see how.
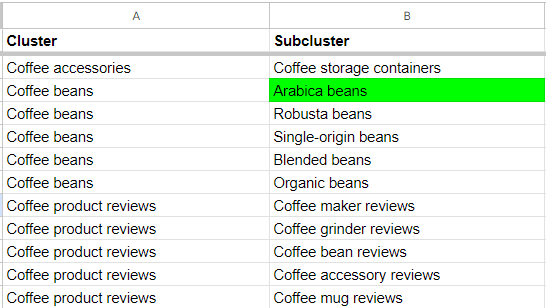
If you’re doing this exercise for an existing site, highlight the clusters of your topical map that you already have content for. In the next steps, I’ll show you how you can plan around existing content.
So to recap, you create your topical map. And then you expand on it. And you can do both with my topical map guide , which contains the app, prompts, and steps.
3. Answer Socrates Export
At this point I have an expanded topical map. It’s just a spreadsheet with two tabs. The first tab being my initial map containing high level information. And the second tab is the expanded topical map, which is the output from the topical map generation and expansion exercise.
I’ll also highlight the clusters I have covered already on my site. Now I just need to grab a single sub-cluster, and expand it into topics.
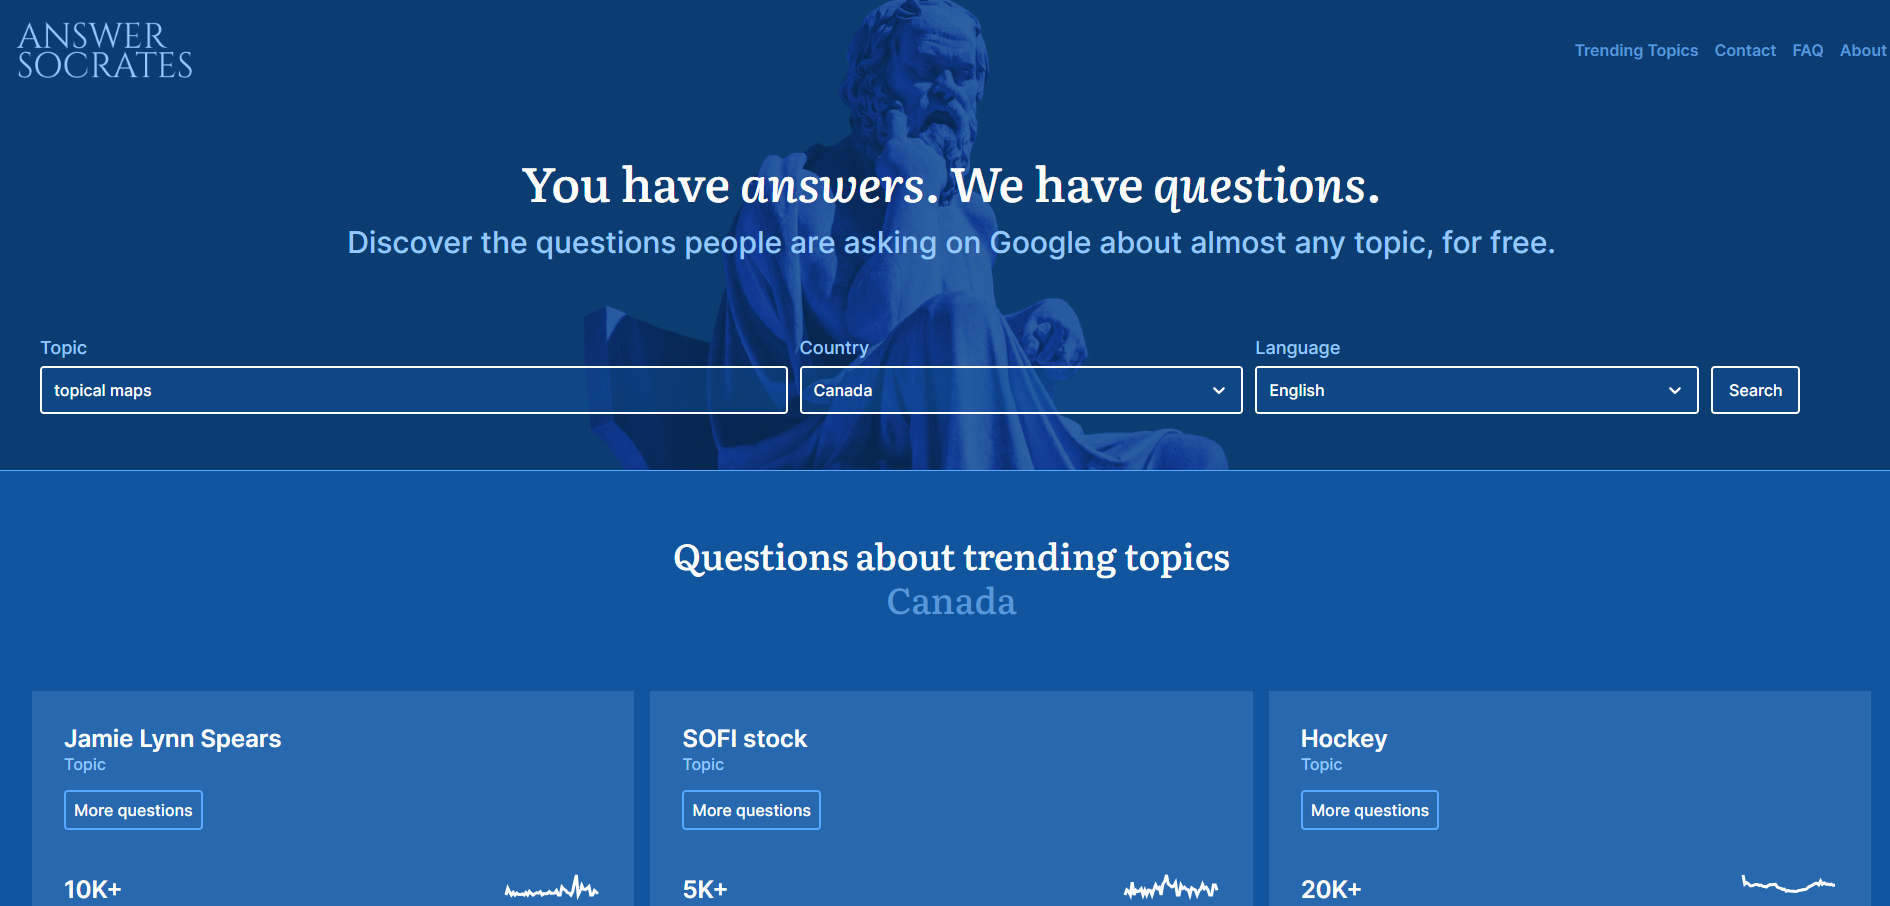
The easiest way to do this is with a tool like Answer The Public. However, I found that Answer Socrates basically does the same thing for free. You input your target keyword, which in my case would be the subcluster name from the topical map.
Export topics for my subcluster
Once I enter my target keyword into Answer Socrates, I simply click the button to generate my list of topics.
These apps will pull Google’s autosuggest results. Finding questions and variations of a keyword. Answer The Public has a few bonus features like search volume and fancy visuals. Answer Socrates is a free and barebones version.
I download the Answer Socrates topics sheet for my subscluster, and upload it to a new tab in my topical map planning sheet. I then rename it the exact same name as my subcluster. This ensures I won’t get mixed up as this document grows. There will eventually be a ton of tabs.
4. Extracting Bold text from the SERP
After I have my Answer Socrates file downloaded, I want to bulk extract all bold text from the search results for each query, which will be called Question in column C in the Answer Socrates sheet.
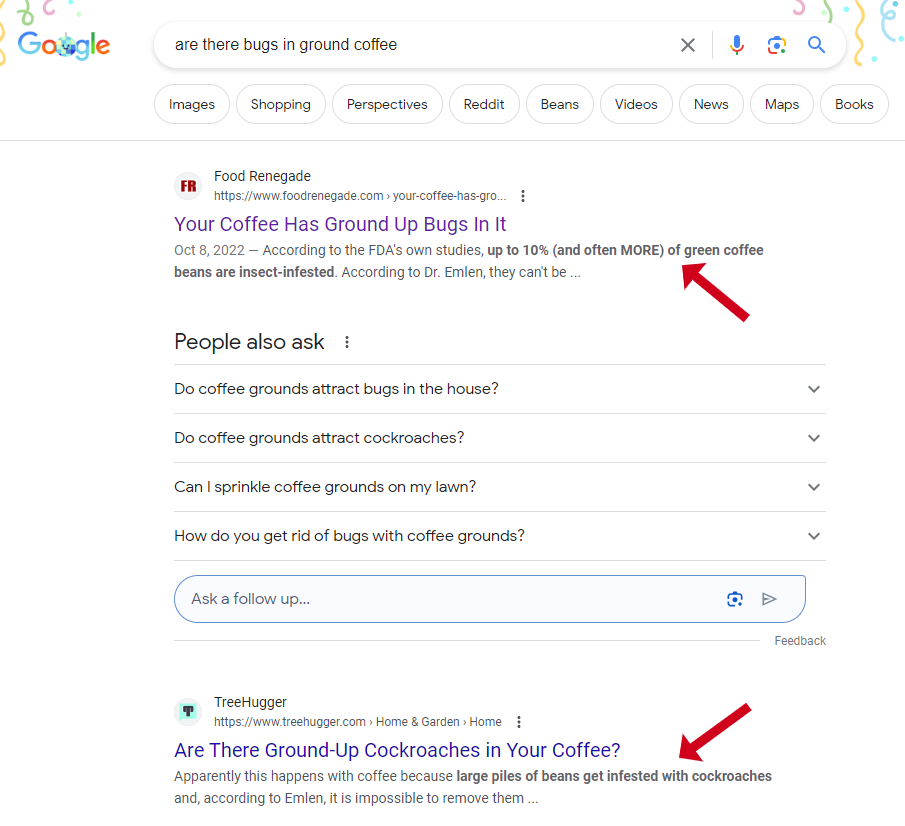
Why grab the bold text?
These are the most relevant words Google found for the query. Google makes the extra relevant text bold, to show searchers that highly relevant content was found.
I’ll use the bold text keywords to feed my prompts for my titles, meta descriptions, and content. It helps ensure my content covers the essential words and phrases that Google is looking for in order to map my page to that query on search results.
Bulk bold text SERP scraping
I created a script that scrapes the bold text using the Google Custom Search Engine API, because subscription SERP scraping APIs are too expensive. Plus doing it manually is time consuming.
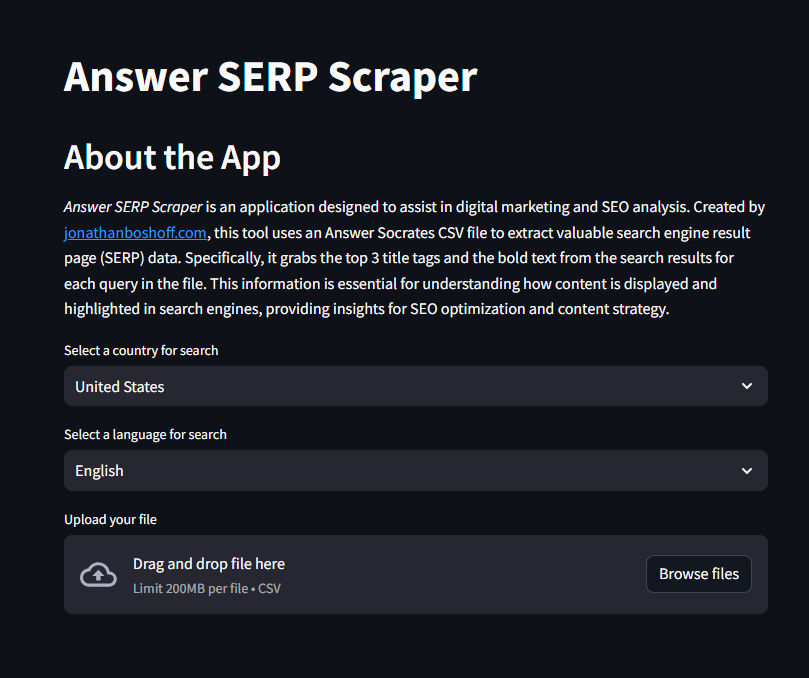
You can do this part manually. It only takes a few minutes. You can also use my Bold Text SERP grabber Chrome Extension to assist.
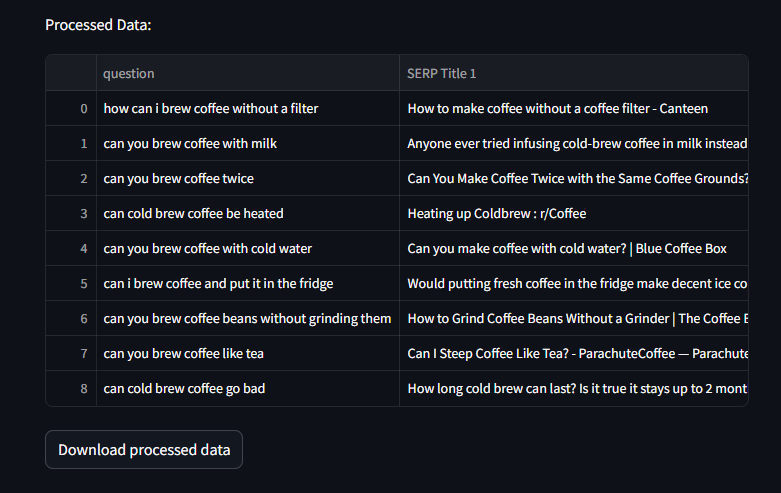
5. Extracting the Top 3 SERP Titles
Similar to the process above, I’m grabbing the top 3 search result titles and adding them to columns on my sheet.
The three title tags will help the AI understand the overall theme of the content to generate. It helps create better SEO titles too, because it will be based on top ranking results.
I use the same app for grabbing SERP titles. It does it all in one go. Titles and bold text.
Manually excluding certain results can be beneficial
If you’re doing this manually, consider excluding ultra-high authority brands. For example, Amazon might be ranking with a crappy title tag just because they have so much Authority and brand recognition.
In cases like this, Amazon’s crappy title tag may be omitted for a more relevant competitor title tag.
6. Assign Content types
Once I have a tab with the completed SERP titles and bold text, I’m ready to assign a content type.
This is an essential step that will help AI generate the right kind of content in the next steps.
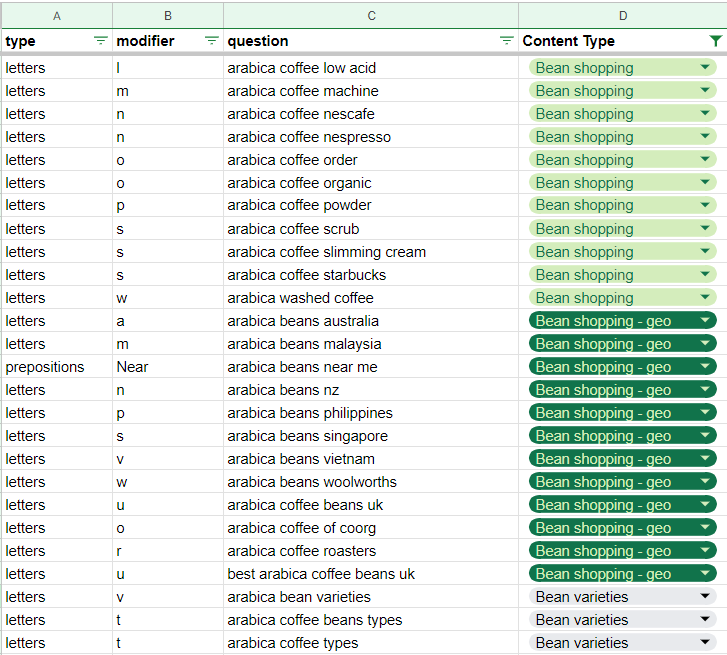
For example, I might notice that some of the searches in my Answer Socrates list are transactional searches where the user is looking for a product.
“Dark roast ground coffee” for example. I then assign the content type “Coffee Shopping.”
And then I might find a result like “how to brew dark roast coffee”. This is an informational search, and the content type could be “Brewing Guides”.
Collect recurring content types
At the end of this exercise I’ll also create a list of recurring content types.
For example, a commonly recurring content type for a coffee site might be brewing guides for specific types of coffee.
Now I can expand my topical map with a list of brewing guides for popular types of coffee in the future.
I assign content types manually still. And I like to use an expanding list of drop-downs to do so. This ensures I don’t make content types that are too similar and redundant.
7. Layered initial content generation
Now that I have a completed sheet for a subcluster, including the top 3 SERP titles and bold text, with assigned content types, I filter out queries that I already have content for. Then I’m ready to generate the initial content.
I’ve learned that a sequential and layered approach works best.

I’m breaking my content generation tasks up into several steps:
- Content Brief
- Title Tag / H1
- Meta Description
- Intro
- Main Content
- Supplementary Content
- HTML
- HTML v2
- Helpful Content Check
- Final Content
I can do this entirely within Google Sheets. With the GPT For Sheets extension. It allows you to use ChatGPT prompts within a cell of a Google Sheet. And you can reference other cells in your document as input. You just need an OpenAI API key.
I have 10 columns, each with their own prompt inside. This 10-step process is fairly consistent, and fast!
Feeding GPT for Sheets other cell values as inputs
My favorite use for GPT for Sheets is feeding values from other cells as inputs. For example, in my first content brief step, I’m feeding it my target keyword (the question), along with the Content type, and Example titles 1-3. This helps the prompt produce the right outputs.
![]()
In my meta description prompt, I have it set to use bolded text keywords from my Bold text column.
Break content generation into sections and combine
I find that breaking the content into chunks (Intro, main content, supplementary content) created better and more consistent results.
The HTML and HTML v2 steps are there to combine the 3 content columns into 1 HTML page. And then HTML v2 fixes any formatting errors for me.
Content improvement columns do some initial edits for me
The helpful content check column runs the HTML against a fairly standard checklist based on Google’s helpful content guidelines. The output is recommendations for improvement. And then the final content is the last iterated round of content attempting to apply the helpful content recommendations.
You can do your own checklist review prompt column. For example, ensuring content meets certain brand or tone guidelines.
Generate column by column instead of row by row
I find it easier to generate cells column by column instead of row by row. So generate all the titles, then all the descriptions, and so so on. By clicking and dragging your prompt formula for the whole column.
Cost effective SEO content generation
This whole process cost effective! It cost me a few cents in OpenAI usage. And a few cents for Search Engine API calls for the scraping.

The final content generated using this process is far from perfect. Some pages will need do-overs. However, the end result is a subcluster of starter pages with SEO basics covered.
By creating content based on questions about a topic, including titles and bold text keywords, I have pretty much checked all the necessary SEO boxes for indexation.
What is unchecked at this point is making the content better so that humans actually enjoy reading it. More on that in the next steps.
8. Uploading content and initial edits
In my process, I’m going to upload my content into WordPress, and make a few basic formatting edits.
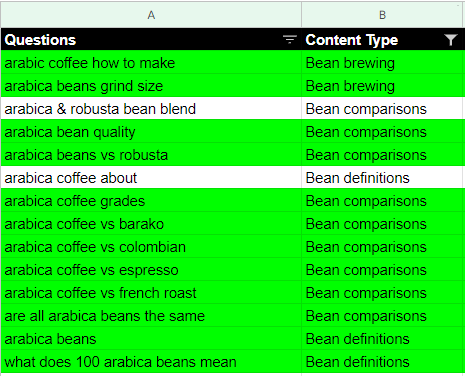
I’ll also combine similar results as I go. Instead of weeding out similar questions and content generated in the initial stage, I like to let it generate and combine later on.
Combining similar content and reducing redundancy
When working with two similar page outputs, I extract gold nuggets from one content and merge it with a similar page.
For example, two similar question rows will result in similarly generated content. So I use content A as the primary, and I extract anything valuable from Content B, and bring it into content A. This allows me to cover content A with more depth, and reduce the redundancy of having similar pages.
Plus any pre-existing pages can benefit from any new valuable information generated from this exercise.
My content publishing approach
I’m publishing 24 pages of content now for initial ranking and testing. But I’m going to hold off on publishing most of the content.
I’m going to publish at least two hundred pages all at once in the next stage to see what happens.
9. Internal linking and indexation
After my content is on my CMS, either live or as a draft, it’s time to add internal links.
Often times, a new page needs at least 1 internal link for Google to index it. I like to shoot for 3 contextual internal links per page.
Meaning I will use the text within one post to link to 3 related or similar posts.
To do this, I use my internal linking automation script. It uses the Google Search API and recommends up to 10 links per page and keyword.

However, I still add the internal links manually and choose my own anchor text. I have an app that helps with anchor text placement and selection as well.
Some other essential bases to cover include ensuring new pages make it to the sitemap, and using structural internal linking strategies to get more internal links overall.
10. External linking improvements
During content edits, I look for opportunities to link out to other sites. The most obvious way to do this is any time I make a claim.
For example, if my content said a percentage like “according to the FDA, ground coffee can be up to 10% bugs“, I would want to link to a credible source to back that claim up.
This is a web best practice. Provide proof wherever possible.
Use Perplexity.ai to find statistics, quotes, and more
Other ways to add external links include providing a quote from a reputable source, or adding new statistics to a page to make it more credible.
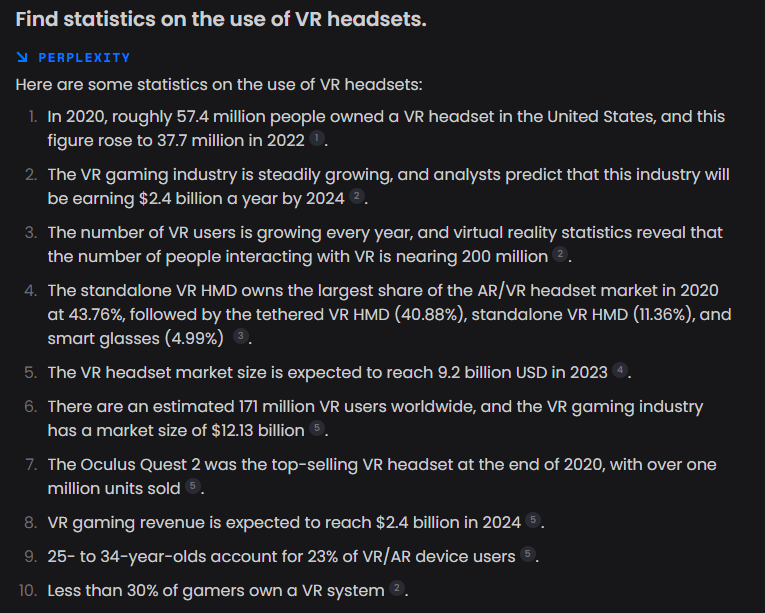
I like to use Perplexity.ai for this process. Check out my Perplexity AI prompts for boosting EEAT for this step.
11. Featured images
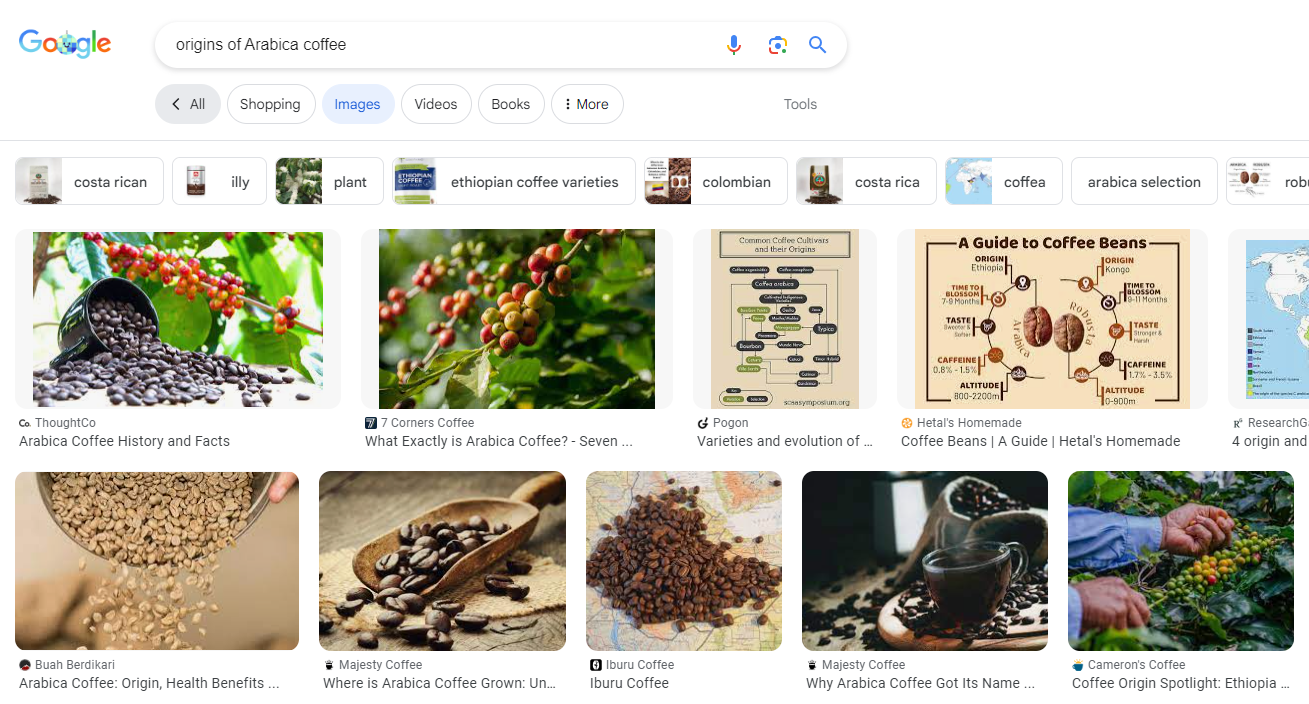
Adding a featured image is a nice touch. I don’t use apps or AI for this step. I’ll typically Google my target question again, go to Google images, see what comes up for that search, and use something similar as my featured image.
Google image search for featured images
For example, if I searched for the origins of Arabica coffee, and the image results are of coffee beans being harvested or maps of coffee, I know that my image needs to be similar.
Unique images work best
You can generate your featured image with Midjourney or Dall-E. But the best option would be to create a unique image that doesn’t already exist. This provides a “unique authorship” signal to Google and other search engines.
During the image process I’ll also add a secondary image somewhere on the page if I think it’s needed based on what’s ranking.
I’ll cover adding valuable images like charts, diagrams, or other media in the next content improvement step.
12. Content improvement
I’m big on improving AI content. I have several tools and guides that can help you do this.
It’s important to remember that at this point in my process, the content generated has not done anything to satisfy a real human user.
I’ve simply checked the SEO boxes for relevance and topical coverage. That’s enough to get into Google’s secondary index. The B team.

What is Google’s secondary index?
The secondary index is where lower priority or lower volume pages get indexed and tested against various queries. Pages that perform consistently get bumped up in rankings and eventually make it to the primary index, the A team.
Google collects data such as user interactions, engagement, clicks, search refinements, and more. Google is constantly testing different web pages against different queries to ensure the primary index contains only the cream of the crop.
Why does Google use primary and secondary indexes?
While Google hasn’t openly discussed the use of a primary and secondary index with the SEO community, they have several patents around this topic.
Bill Slawski knew about primary and secondary indexes since 2006! Bill also tied this patent to the commonly referred to “Google Sandbox” – where new pages and sites struggle to rank initially.
Cost savings and faster search results
Using primary and secondary indexes is a cost saving tactic. Google has to compute 8.5 billion searches every day. So breaking searches up into different buckets for faster retrieval makes sense. It would be much more expensive to serve the full index of results every single time someone performed a search.
Improving content quality and user ROI
To get my content to a place where it can perform consistently, I’m going to need to improve it for humans. This is where content improvement tactics comes in handy.
For example, I can reference YouTube videos for ideas, or PDFS. The goal is to bring unique information to the search results instead of just parroting everyone else.
Here are my content improvement tools you can try:
- Check content for Google’s helpful content guidelines and quality rater guidelines
- Automate Matt Diggity’s EEAT Comparison Prompt
- Prompts for adding first-hand experience to your pages
- Prompts to boost on-page SEO with YouTube transcripts
- Prompts to extract Information Gain From PDFs
- Generate text to target Featured Snippets
Content improvement goals are user focused
The goal with content improvement is to make readers stick around. To get them to continue scrolling.
This is also the appropriate time to add additional media like images, charts, diagrams, screenshots, videos, infographics, etc.
Overarching goals to keep in mind when updating content:
- To keep providing more valuable and informative information.
- To make your page the best possible search result for specific search terms.
- To provide the most complete document on the web for this search.
The goals here are less SEO focused, and more user focused. Content improvement aims to increase the user’s ROI from visiting your page.
Google knows if your page was helpful
Google can tell how satisfied a user is with a page by looking at metrics like returns to search, and search refinement.
Google can tell if your page sucks
For example, if someone visits your page, exits within 5 seconds, refines their search, and visits a different page, that suggests to Google’s algorithm that your site was not a relevant result for that user’s query. Search refinement can be a sign of an unsatisfied user. Who now has to do more work to find the right search result.
How Google measures search satisfaction
If the opposite were true, and the user didn’t return to search or refine their search, it could suggest that the user was satisfied with your page. Sending positive ranking signals that suggest your page is relevant for that query. Google will then index and test your page for similar and related queries. This helps you gain footing in the primary index.
Content improvement vs re-optimization
Note that content improvement is different than content re-optimization’s. Re-optimization is a keyword focused approach where you are redoing the TF-IDF of a page to improve how many queries your page gets indexed for. For example, including more uses of a specific keyword, adding recommended entities, adjusting heading keyword usage, etc.
Don’t forget about Content updates
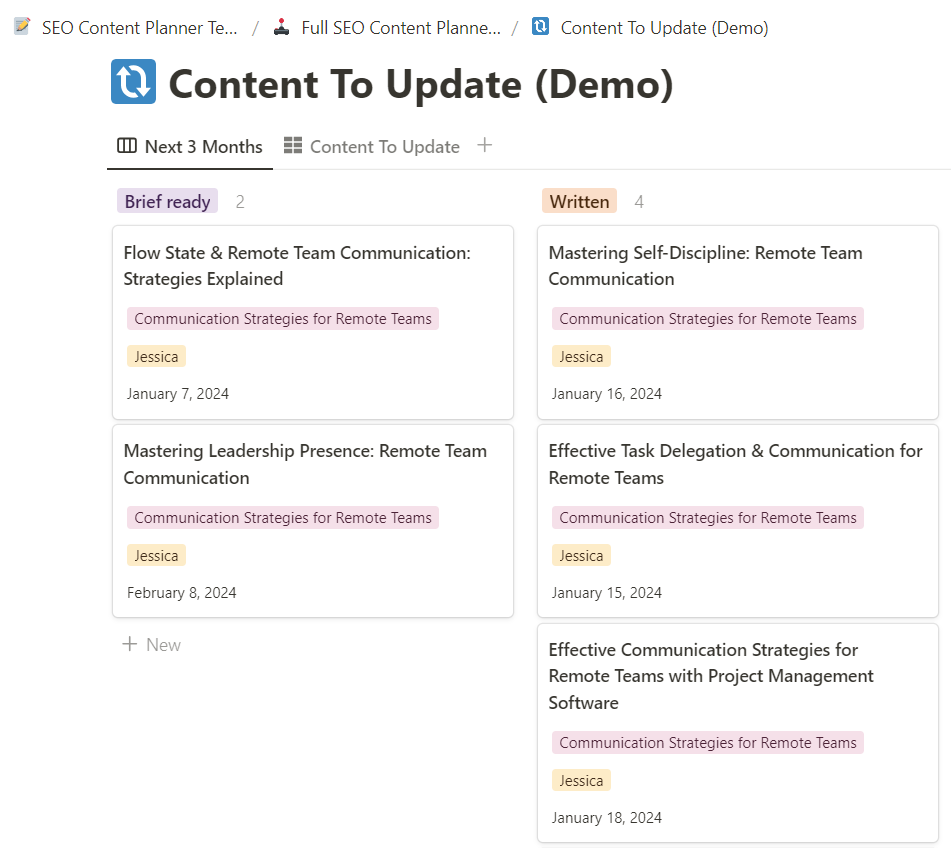
Its not enough to simply generate and improve content one time. You need to continuously improve it.
Each page you create is a machine that will ideally bring in clicks on a consistent basis. In order to continue doing that, they must be maintained.
Things to work on when updating content
- Content has to be kept up to date factually. 2022 pages must be updated to 2023. Reference a newer study with more up-to-date data.
- Content needs to be gradually improved to compensate for competitors who will make a better page than what’s out there.
- Content needs to be expanded with new information. For example, adding a quote from a reputable source to make your article more credible.
- Content can be upgraded with new media like images, visuals, or videos.
Setting a content update cycle
You should set a content update cycle for each page based on their importance. For example:
- Pages brining in 1,000 clicks per month could be updated quarterly.
- Pages bringing in 100 clicks per month could be updated every 6-months.
- Anything less than that can be updated yearly.
You don’t have to follow these exact guidelines for content updates. Do what makes sense for your website.
A Note on using AI-generated content as a testing ground
My strategy is to generate AI content, publish it and let it rank. And then improve the content that shows potential with manual edits and improvements. There are some big advantages to this method that I want to test out.
Collecting Real Field data
The main benefit is field data. I’ll be able to collect “real” keyword research from Google Search Console, which is significantly more accurate than a tool like SEMrush or Ahrefs.
This tactic may be particularly useful for industries or new topics where keyword tools are lacking in useful data.

Validation before investment
The secondary benefit is validation. Some pages will perform better than others. And I learned that I cannot accurately predict which pages will perform well.
With this method, I can improve the pages that already show promise, instead of wasting time and effort making awesome content that no one will ever find on search.
A page that gets no clicks happens more often than you think. in fact, 96% of web pages get 0 traffic from Google.
Can’t try this strategy? Consider a test site
If you like the idea of this strategy but you know you couldn’t get away with it on your site, consider creating a testing site.
Even if you can’t test AI content on your main site, you could consider starting a side blog just for collecting field data and getting validation.
You’ll know what pages to make and have a better idea of how they will perform. You can put your spammy AI content on the test site, and your human edited content on the live site.
Repeating the process
This entire process covers one subcluster of content.
For the site I’m working on, I got 21 topics covered out of 1 subcluster.
Plus these 21 topics only covered the informational queries. I’m saving the more transactional ones for future content.
My topical map had 50 subclusters to start with. I could easily make another 500 pages without even expanding my topical map.
Producing the next subcluster of content
When I’m ready, I just repeat this process for another subcluster.
I’ll jot down recurring content types as I go, which gives me everything I need for further topical map expansion later on. It also helps me find additional topics that may not be covered in Answer Socrates results.
Infinite content. Infinite validation. More informed human resourcing. Streamlined processes. Another buzzword here.
Next steps: building and sharing
This guide covers my step-by-step process for planning and generating AI content.
Now you have everything you need to plan, create, and improve AI content at scale.
I’ll be putting this process to the test and sharing my results.
In the meantime, I encourage you to take my process and build off it. Iterate on it. Make it your own!
If you’re interested in learning SEO prompt engineering or how to build and use no-code apps to automate SEO tasks, check out my AI SEO Academy.
