With AI content generation tools like ChatGPT, the web is quickly being flooded with AI-generated content.
This week I tested out just how easy it is to actually create entire websites in minutes.
I built a 500-page glossary website using ChatGTP, Google Sheets, GPT for Sheets, WordPress, And WP Import Lite.
I’ll show you exactly how I did it step by step. Let’s jump in!
The test site
I built this on a site that is already composed of entirely AI-generated content.
There are only about 20 posts on there right now and it’s just starting to get a few clicks here and there with only 1-page ranking for anything. It’s about 7 months old.

It’s not an aged domain and it has no backlinks. It looks like it is starting to leave the sandbox phase though.
I’m looking forward to seeing what kind of SEO results these pages will get. I will update this post periodically as the new pages age.
Step 1: Topic categories
First up, I will need some category ideas. I could have come up with some on my own, but I just used ChatGPT for this.
I feed ChatGPT some info about my site and let it cook. It made 30 categories. I’m going for 100 glossary pages per category.
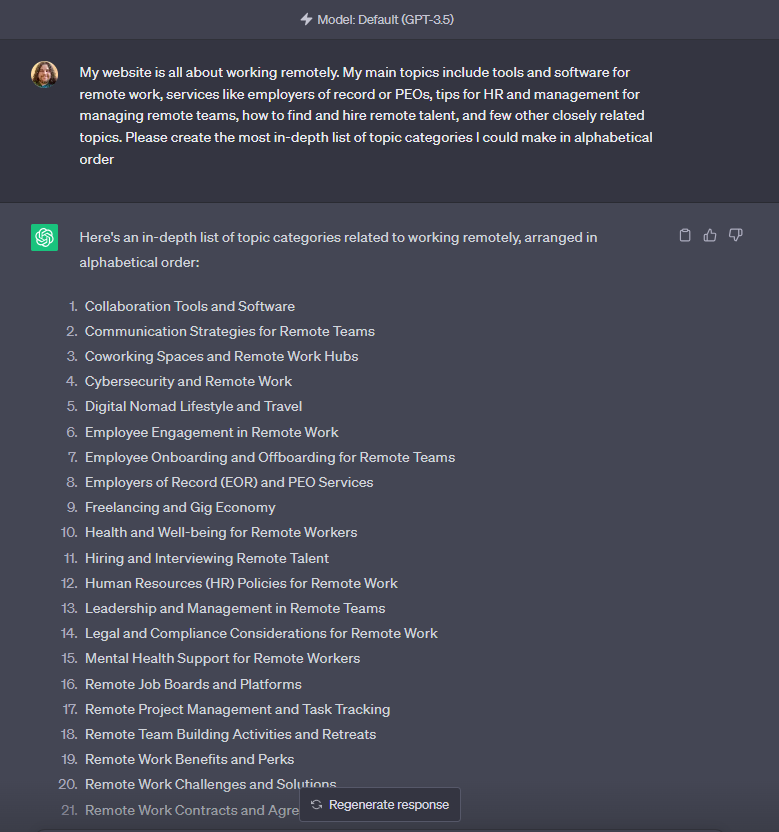
Here’s the prompt I used to generate my category ideas:
My website is all about working remotely. My main topics include tools and software for remote work, services like employers of record or PEOs,
tips for HR and management for managing remote teams, how to find and hire remote talent, and few other closely related topics.
Please create the most in-depth list of topic categories I could make in alphabetical order.
Step 2: Generate a CSV and make a spreadsheet
Next, I need all of these categories as columns on a spreadsheet.
I’ve learned that the easiest way to do this is to prompt ChatGPT to turn your list into a CSV.
Here’s the prompt I used to generate my CSV category list:
Turn this list into a csv with each category as a new column. There should be 30 columns in total and only 1 row.
- I then copied the CSV to a new text document and saved it as keywords.csv.
- Then import the CSV to a new Google Sheet. It should look like this:
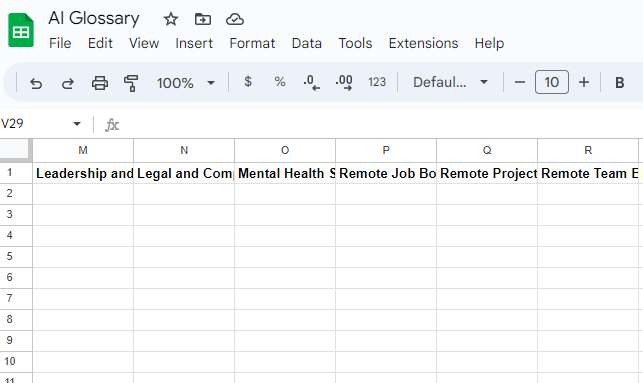
Now I have a spreadsheet with 30 category columns. I’ll fill these with topics in the next step.
Step 3: Generate topic ideas for each category
I want to speed up the process for this so I’m going to use the GPT for Sheets extension which allows me to fill all these columns simultaneously.
It does require an OpenAI API key, as in you have to pay for it. It only costs a few cents though.
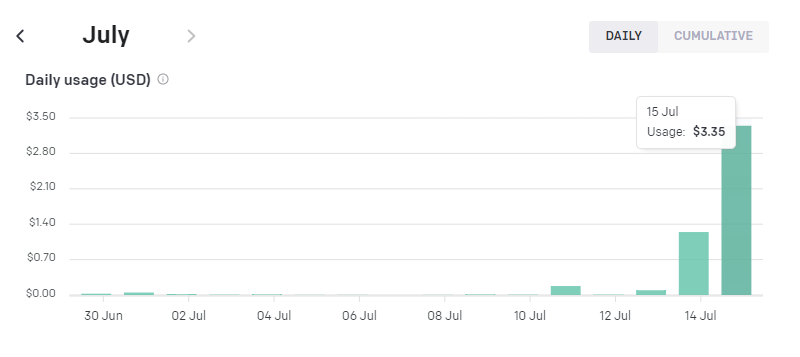
In total, it cost me under $5 to build this project. I recommend getting an API key and using the sheets plugin to save hours of effort.
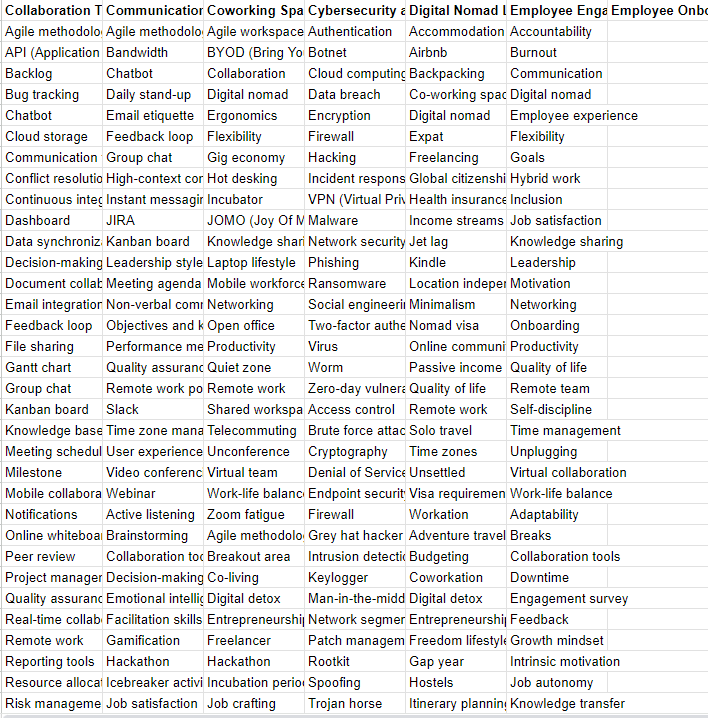
Here’s the prompt formula I used to generate topic ideas:
=GPT_LIST("provide an list of 100 glossary page ideas sorted from A-Z about "&F1&". Topic ideas should be short and focus on definitions of common terms and abbreviations. Do not include letters, symbols, or other naming conventions within output text. Exclude brand and company names.")
Step 4: Download WP Imp Exp Lite
I need a tool that allows me to upload posts to WordPress in bulk. I’ve used WPAllImportPro in the past. But for this experiment, I decided to give WP Imp Exp Lite a try.
It promised a simpler and easier experience, which I’m good with if it can deliver that. (It did)
The reason we need the tool now is so we can download the existing posts as a spreadsheet to get an upload template. These importing tools have a very specific way you need to upload your content to work, so I’m grabbing the template first and building off of it.
Setting up WordPress
Note that I’m not going to include any of the basic setup steps on how to get a WordPress site up and running.
There are lots of great resources on the web to help you get started. I linked to a very detailed guide above.
I then went through the steps of exporting my existing posts and I clicked the “download as import template” option, which gives you the correct format for importing.
Here’s what the template looks like:
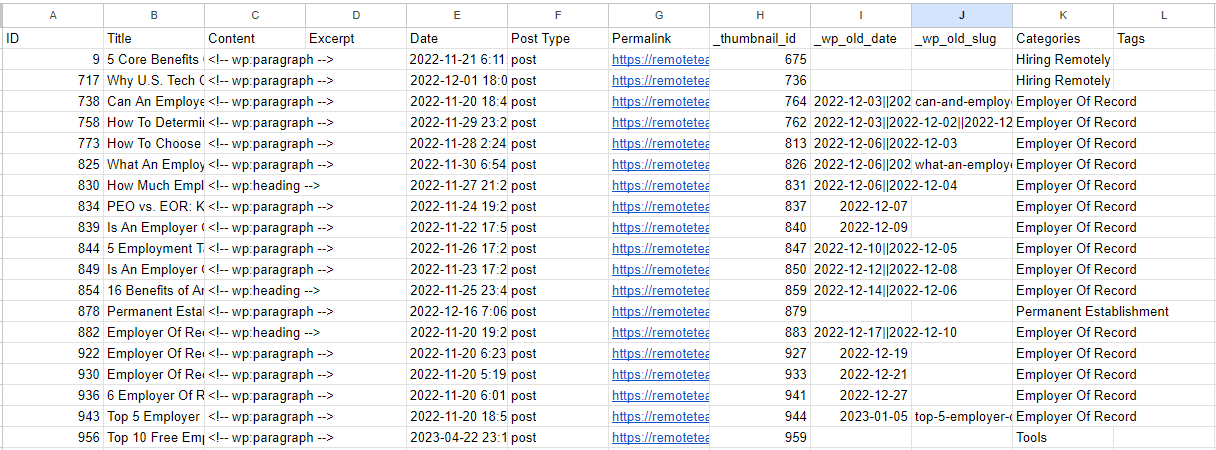
This gives me an idea of which columns I want to populate. Now I just need to turn my topic ideas into filled-out rows
Step 5: Build a content spreadsheet
Now that I have the format needed to upload content, I just need to fill in these columns. I used a mix of formulas and GPT for Sheets to accomplish this.
Most of the columns were fairly straightforward, for example, I use the category from my previous step as the post category. I used the target keyword as the tag.
The only difficult column is the content column. That column represents all the actual content of the post.
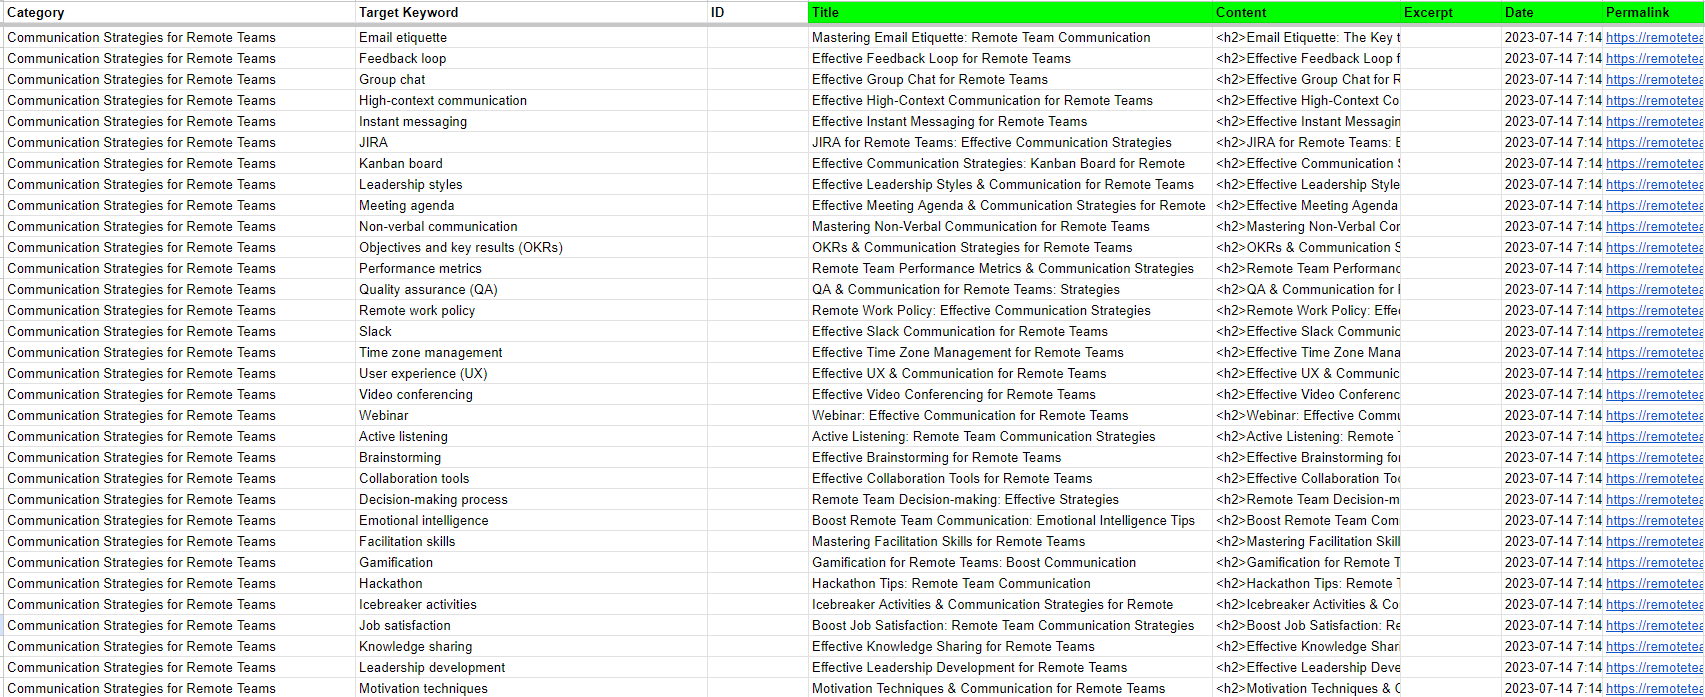
It took many revisions to get a prompt that produced half-decent results. I used my data from other columns like the category and target keyword and some additional SEO specifications to inform the prompt.
My final prompt produced up to 1,000 words of text. Used links sometimes, had a bit of personality, and even attempted one internal link in each post.
not bad!
Prompt for content:
Because generating the content is going to vary a lot by site, I encourage you to come up with your own prompt to fill this column. My prompt barely works for my site! 🤣
Here are some tips instead.
Things I learned with content generation prompts:
- The more instructions you give GPT the more likely it is to not follow all of them, which makes it difficult to produce high-quality content at scale.
- I tried a multi-step process to generate content where I generated the content in step 1 and then revised it with links in step 2. I got worse results than trying to do it in one prompt.
- More is less, you want to get your requests communicated with the least amount of words. The more you have to explain and patch issues, the more room for additional errors.
- Using a character profile is a great way to add some personality to the content. My character profile was Ashley, a friendly and informative marketing manager who has been working remotely for 10 years. She even awkwardly introduces herself and references her experience sometimes.
- I couldn’t get it to use the correct internal links or anchor text. Sometimes it used poor links like “Check out this link for more information” and most of the internal links didn’t work. I can use an automated internal linking plugin to help me fix this.
- It struggles to include working external links. I could not get around this and ended up going for a solution that only worked sometimes. I’ll have to try and automate external linking next.
Step 6: Canva bulk image creation
I wanted my posts to have a featured image, so I created them in bulk with Canva. This was surprisingly easy.
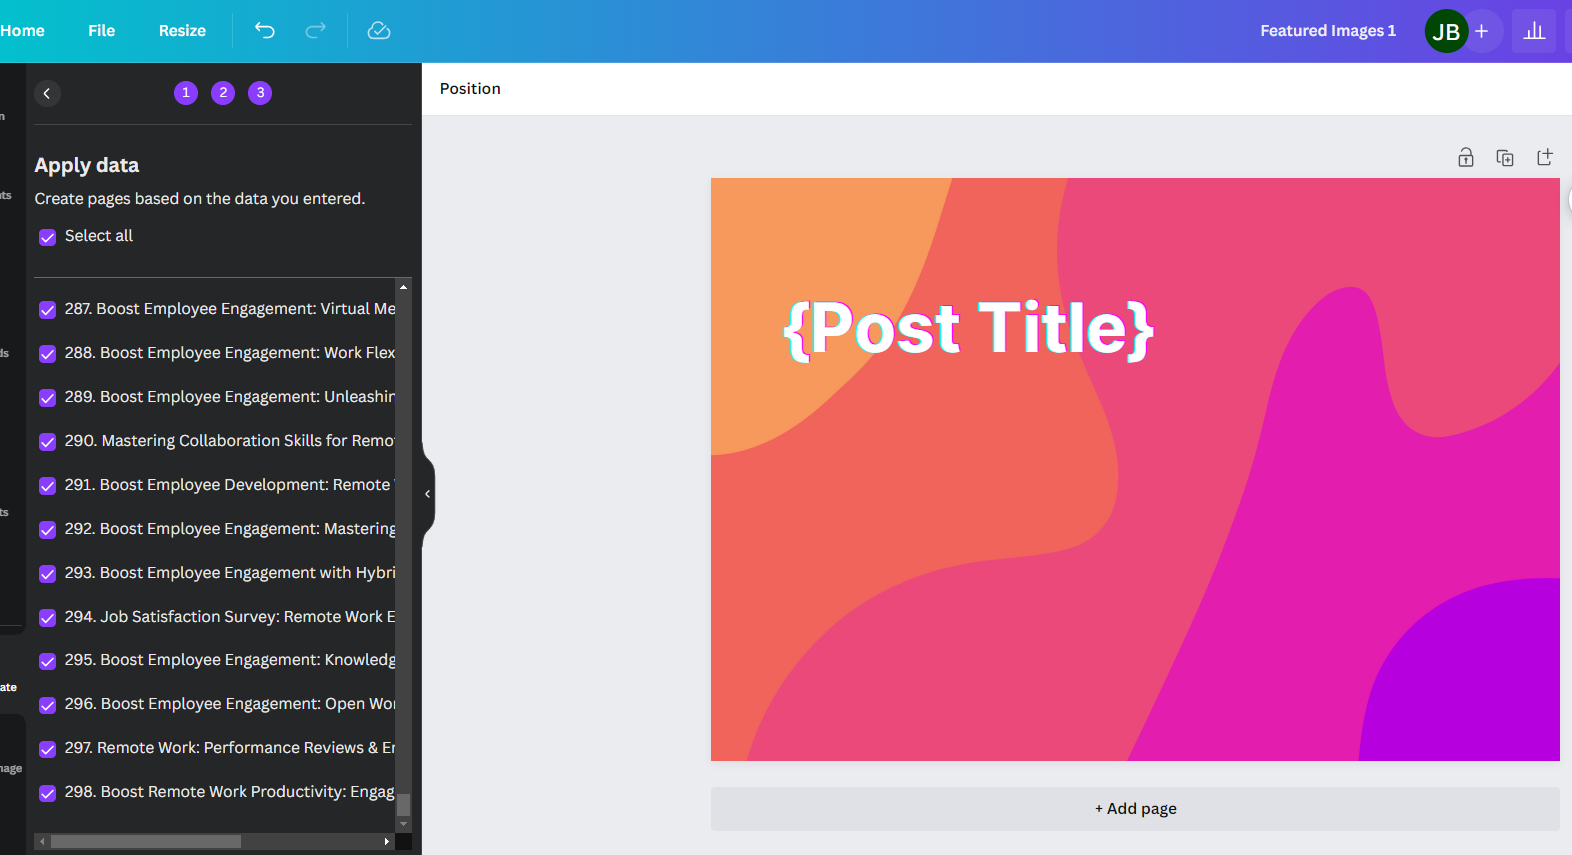
First I created a template, then I use the bulk upload app in Canva and upload a list of the page titles.
This created a nice featured image for every post:

Check out this Canva bulk guide for details, it only takes a few minutes to learn.
Step 7: Bulk register images
I learned this the hard way. You need to register new images to the media library first before uploading your file.
I went and uploaded all my images to my wp-content folder through my file manager and had to redo my content import.
Downloading from Canva:
- When you download bulk images from Canva they come in Zip format, which is great for uploading to the web.
- When you upload a zip file to your website through your file manager (FTP), you can upload all the images within the zip file easily.
- Then you export the zip file into one of your uploads folder. Mine was: public_html/wp-content/uploads/2023/06.
- Canva only allows you to bulk upload 300 images at once, and the image file names are all just numbers 1 to 300. You may need to split these into multiple folders.
Uploading to WordPress through FTP
Because I had more than 300 pages, I had to split the uploads into 2 folders. my June 2023 folder and my May 2023 folder.
This allowed me to overcome the issue that two zip files contained images with the same names.
Bulk registering media files
As I mentioned earlier with WordPress, you need to register your images to your media library first for them to successfully attribute to a post.
I used the plugin: Bulk Media Register. It allows you to register your new media for an entire folder with 1 click.

If you register your images before uploading, your featured images will assign properly. Don’t forget this step!
Step 8: Uploading with WP Import
After completing my export file and saving it as a CSV, I start a new import with my WP Imp Exp plugin.
It’s an easy step-by-step process and allows you to update your field mapping before importing.
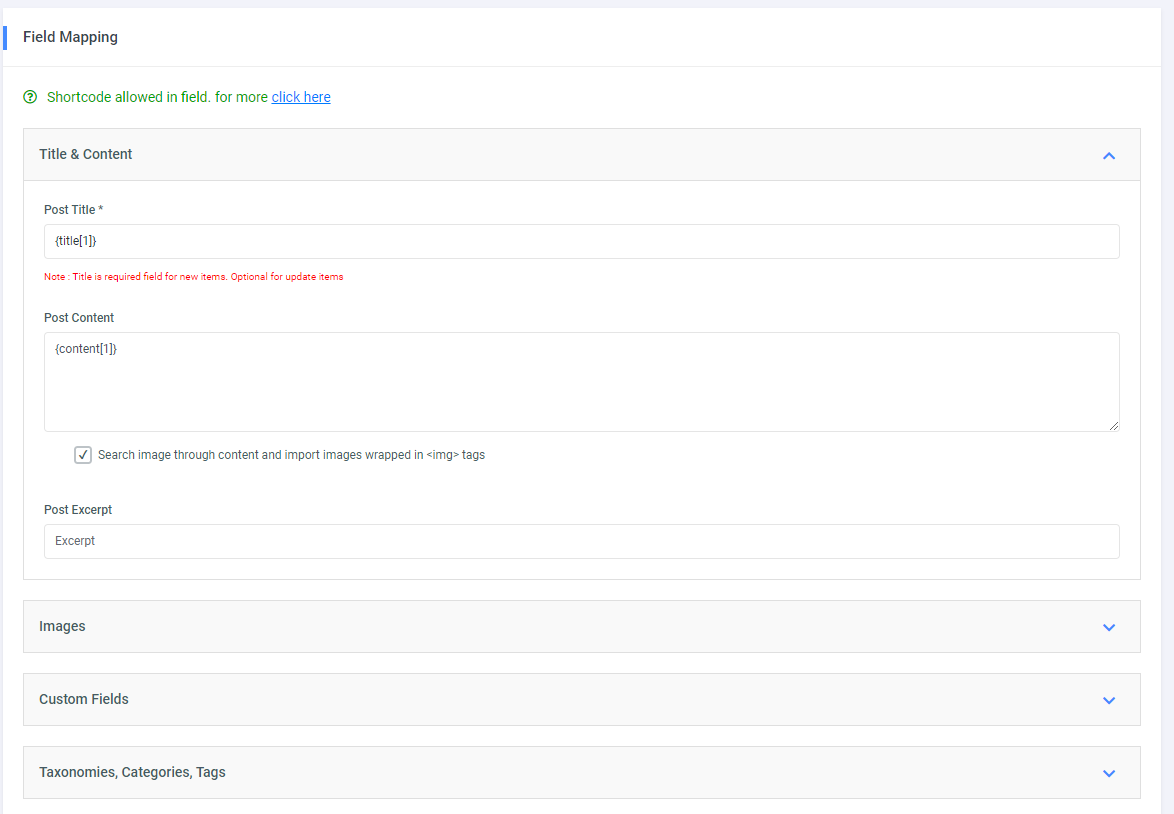
It only took about a minute to upload my pages and it worked great. A nice free and simple alternative to WPAllImport.
Step 9: Check out your pages
After my upload is completed I had more than 500 new pages on the website.
The process is pretty quick and easy. It’s never been easier to build websites at scale.

Although this was a fun experiment, it’s important to understand that this is basically exactly what Google does not want you to do.
They recently changed their mind about using AI to generate content, Google emphasized the importance of making helpful content as a response.
🚨Google states making AI content primarily to manipulate search rankings is against their guidelines. 🚓
It’s best to have a real human review and revise all AI-generated content before publishing. AI can hallucinate and make false claims.
Interesting things I learned along the way
- This method doesn’t work perfectly and there are still limitations with what AI can do.
- ChatGPT for Sheet with the GPT3.5 Turbo 16k allows you to write 100 pages of content up to 1,000 words each in 3 minutes.
- It took me under 6 minutes to produce 500+ pages.
- It cost me a whopping $3.35 USD to generate these pages!
Final thoughts
- I’m impressed and concerned at how easy this was. I could have easily kept going to 3,000+ pages.
- I’m still learning. Don’t expect to see results copying this! 😅
- I learned a lot which is going to help me make even better programmatic AI content in the future.
- This method would work way better for more templated pages such as city pages, template download pages, or service pages.
Check out my AI site
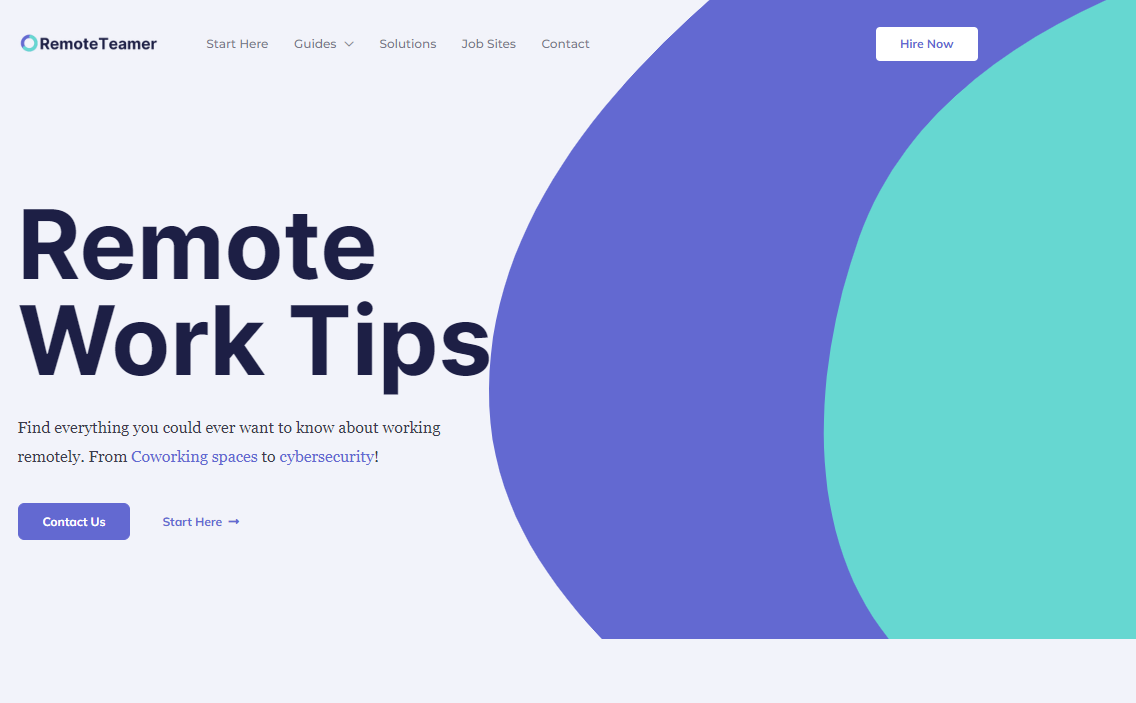
The site is RemoteTeamer.com. Everything on there is 100% AI generated!
I’ll post updates to see how these new pages do over time.
Try for yourself
If you’re interested in building a programmatic SEO site or set of pages, it literally has never been easier.
I encourage you to try this for yourself or do something similar.
Connect with me on LinkedIn if you want to talk about AI and Programmatic SEO.

